We are grateful for our lovely followers

Follow on Bloglovin

Google Website Translator Gadget

Thursday 29 October 2009

TUTORIAL - STAMPING BASICS

This is the first of several stamping tutorials. As its such a large topic they will be coming over the following weeks. I have started with the very basics so that somebody who has never stamped should be able to understand where to start.

Further tutorials will be coming to cover heat embossing, brayering, masking, digital stamping and further tricks and tips. If you have any questions or anything you'd like to see then please email me and I'll do my best to help!


*******************************************


If you're relatively new to cardmaking chances are you will have come across stamping, its in all the mainstream magazines and most craft shops will stock them. If you are anything like me and rushed out and bought a couple of stamps you liked the look of then great! Next thing is what do you stamp WITH?


Firstly we'll take a look at the type of stamps available.


STAMPS


Your stamp will probably be one of these;


1. Wood mounted

A rubber image is mounted on a piece of wood which usually has a picture on the other side of the stamp. This type of stamp you just ink up and stamp! It has its own cushionning so you should get a clear crisp image.


2. Unmounted rubber

These are usually red, blue or grey in colour and just contain the image that you stick to an acrylic block. You buy them singularly or on sheets which you cut out the images yourself (leaving a small border around) As they have no cushionning you may need to put extra card or an old mouse mat underneath your cardstock to get a clear image.


3. Clear Polymer


This is the same as an unmounted except the rubber is polymer and you can see right through it to the other side which allows for more precise stamping. You buy these singular or on a sheet and they usually have a backing sheet of clear acetate on. You need to peel the stamp off the backing and then transfer to an acrylic block. It will cling by itself so no need for glue. As the polymer is much softer than rubber it doesnt usually need any cushionning.


4. Ezmounted stamp


These are the same as unmounted except it has a layer of cushioning (see pic below) which clings to an acrylic block so no need for glue. The cushioning allows for more even pressure to be applied making stamping more crisp and even. You can buy A4 sheets of ezmount and add your unmounted stamps so no need for glue anymore!


5. Digital


These are relatively new on the scene but very very popular and are computer printouts you buy either over the internet or on disc. The advantage of these is that they can be editted and resized, they are inexpensive and will be in your inbox almost instantly which satisfies the impulse buyer like myself :)

All you need is your printer and MS Word or similar if you wish to resize etc. Places to find them include Dewdrop Digiz, Victoria Case, Mo Manning and Squigglefly

There will also be a full tutorial on using digital stamps coming soon.


INKPADS


This area is even more mind boggling than stamps! The trick is choosing the right ink for the type of stamp & colouring medium* you have. Inkpads come in every colour of the sun but are made from different types of ink namely these;


1. Pigment Ink
This is a thick opaque ink that needs heating and/or embossing for it to dry. It is not suitable as a general purpose ink as it requires the use of a heat gun to set. It is intended for heat embossing. Brand names include versa color. Suitable for all types of stamp.


2. Water based dye ink
These are a very popular choice and it will depend on your colouring medium which brand is the most suitable for your work. They dry quickly without heat setting and can be used on most surfaces depending on the brand. You can also watercolour with dye inkpads, just tap a pad onto a piece of acetate and use a wet brush to pick colour up! Brand names include Memento, Adirondack, distress ink, Memories. Suitable for all types of stamp however can appear patchy on polymer stamps depending on brand (Memento is fine)


3. Alcohol based dye ink
These are very fast drying inkpads suitable for most surfaces including non porous like dominoes. They are a very popular choice for people using watercolours as they do not bleed. They cannot be used with alcohol based markers such as promarkers and copics as the alcohol reacts with each other. Brand names include stazon. Not suitable for polymer stamps as they degrade the polymer and it will eventually fall apart (Trust me I know lol lol!)
These types of inks require a special cleaning solution to get them off the stamp.


4. Hybrid ink
These are inkpads that are useful for certain types of project. They're a pigment inkpad so are opaque but dry like dye ink so do not require heat setting on porous surfaces like card. They do require heat setting on porous surfaces like glass, metal and clay. Brands include Palette hybrid. Suitable for all types of stamp.


5. Fast drying pigment
These are also very popular inkpads as they have the opaqueness of the pigment ink but again do not require heat setting and can be used on a variety of surfaces such as acetate, card, dominioes etc. Brands include versamagic, chalk ink, brilliance and heritage shimmer. Suitable for all types of stamp.


6. Watermark inkpad
This is a clear (now also available in sparkly!) inkpad used to create watermark effects on your work or for brushing powders such as chalks, eyeshadows and mica powders over. People also use it to stamp images as it will not dry unless heat set or powdered so stays wetter for much longer allowing you to emboss using embossing powders. As its clear it will not affect the colour of coloured embossing powder. Its a very useful inkpad and definaely one for the stash box! Brands include Versamark.


*Colouring medium is what you intend to colour the images in with such as watercolours, alcohol based markers, chalks, pencils, paints etc


These are literally hundreds of brands and types of inkpad available, where do you start? You now know which type you need for your stamp so which brand you choose will now depend on your colouring medium.


*A good all rounder that you can watercolour with and use alcohol based markers (promarkers/copics) on is Memento. This is extremely popular with cardmakers at present.


*If you intend to heat emboss using embossing powders and a heatgun (or toaster!) then versamark is best if using coloured embossing powders or versacolor if using clear embossing powder.


*If you want to stamp on non porous surfaces such as acetate or dominoes then look at stazon or brilliance inks.


*If you see a coloured image you like then please do ask the maker what they have used, blogland is very friendly and most people are happy to help a fellow crafter to make the right choices.


STAMPING TIPS (Please email me if you have a tip to add!)


*Stand up when you stamp as this creates more of an even pressure than when you are sitting.


*Buy a small brayer which is an ink roller to transfer ink onto the surface of large stamps so that the ink is distributed more evenly.


*If you are heat embossing, rub over the card with an anti static pad, stamp then put on your embossing powder. This reduces any stray flecks of powder sticking to the card. Any stray flecks can be flicked off with a small paintbrush.
If you don't have an anti static pad, they are basically little bags filled with talc so just use the end of a pair of tights, pour some talc in and tie a knot :)


*Wash your hands before heat embossing, this also reduces the risk of stray flecks sticking in places they shouldn't. This is particularly important if embossing on a coated cardstock such as pearlescent. You wont believe how many fingermarks you leave on card which powder such as chalks and embossing powder clings to! Washing your hands takes away the oils that the powder clings to.


*If your polymer stamp seems to spread out when stamped you might be pressing too hard. Polymer is much softer than rubber so doesn't need as much pressure to get a clear image. If the image appears patchy then it might be the ink, waterbased dye inks are translucent and thin so don't tend to stick onto the surface of polymer very well wit the exception of a few brands such as memento. Thicker inks work well with polymer such as pigments, fast dry pigments and hybrids.

*Clean your stamps with alcohol free baby wipes. If you have used stazon ink you will need a special cleaner (Stazon cleaner)
Monday 19 October 2009

CHALLENGE 5 - RIBBONS AND FIBRES

Thank you for all your super entries for our 3d challenge, I've had such a ball going round visiting you all! So many different styles and designs, well done all of you! Also Thank You to La Pashe and Cardmaking with Imag-e-nation for supplying the DT with some items to use and for being our sponsors and to Judy for being our Special lovely guest!
One question answered - Can you enter the challenge more than once?
Yes up to a maximum of 3 separate designs on separate posts/emails.

We had 32 gorgeous entries (Irit, Kym, Alison, Victoria, Irit (2), Sue, Caro, Dee, Jude, Suzi, Ali, Lesley, Angie, Dawn, Sophie, Kaza, Kim Y, Louise z, Glennis, Carol, JulyeB, Tracey, Gvendalen, Susie L, Anne, Nikki, Irit (3), Dawn (2), Vicky, Donna, Mandy, Cindy)

Ok drum roll - The winner of the La Pashe/Cardmaking with Imag-e-nation pack is.....


Well Done Lesley! I've emailled you for your address x
Now our winners of our Top 3 blinkies go to (in no particular order)
Well Done ladies, grab yourself your top 3 blinkie from our sidebar x


*********************************************************
CHALLENGE 5


Our 5th challenge is once again sponsored by the lovely Joanna Sheen. She has some new items in her shop you must go see! Here's a small selection of them.....

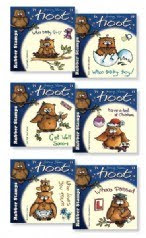
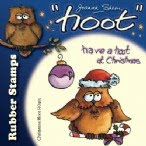
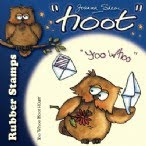
Introducing HOOT the latest character from Joanna Sheen! How cute is he! They are available as value multi buys or as singles but be quick as they're flying away fast!


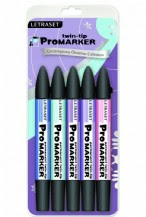
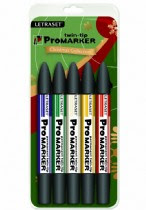
Joanna also has some new Promarker sets in. They are christmas and contemporary christmas. She also has a Promarker mega deal of all the new 56 colours for a limited time only. Click here to see all of the promarker sets available.


************************************************************


CHALLENGE 5 - RIBBONS AND FIBRES


Our challenge this time is to use ribbons, fibres, lace or similar materials somewhere on your design. I know I had a big bag of ribbons for a long time I didn't know quite what to do with until I joined blogland and saw some of the beautiful ways they are used.


Please put your entry in the comments field below Pauline's card by noon (GMT) Monday 19th October. Good Luck!

Here's what the DT have come up with this month!


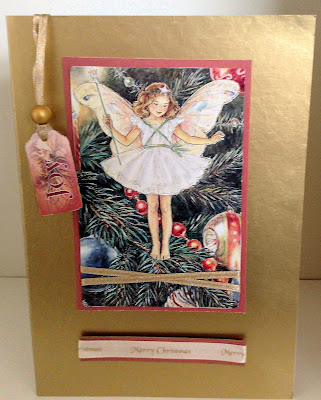
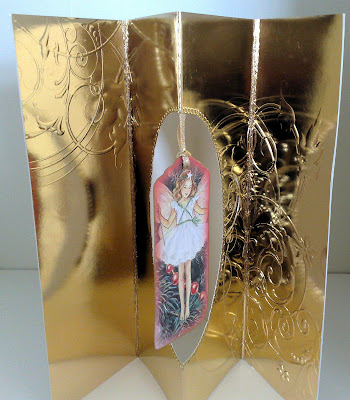
1 gold textured a4 card for front scored in half
1 gold embossed a4 card sored in half then gatefold on both sides. cut an aperture in this one i used ultimate pro.
toppers - free from magazine.
ribbon to decorate.


Joy


For the first card I used a white rectangular card then added a piece of blue handmade paper (from studio) and then having coloured the picture with watercolour pencils. I added some blue beads on the cake and some gold ones in a semi-circle at the bottom. I used Red Glitter glue on the cake & green glitter glue with the gold beads
I stuck that onto a darker piece of paper and stuck it onto the card. I put a border of silver ribbon round the top & two sides & put two pieces of narrow brown ribbon across the bottom I added a gold star in each corner and put 3 hearts on the brown ribbon.


For my 2nd card I used a red square card, then added the 2 rows of gold metallic ribbon across it leaving enough space for a piece of 3mm organza ribbon ... but when the latter was on it didn't look right so I added some gold stars to it.
The image I coloured using watercolour pencils, then finally added the gold bow at the top and the 3 little blue flower shapes at the bottom.


Judie


I have used a image that I got from the craft fair recently, I used an embossed card and stuck down some black squares and frayed the edges, they are almost material but not quite 100% - I used beads for the flower that my teddie is holding and coloured his pot and eyes and noses with silver pen. I used scraps of ribbon to decorate all around the image, and i put little seed beads scattered around the edges. I must apologise for the quality of the image, we are a camera down everyone, i will however retake the photo and put a better quality one on my blog. Soz - Hope you all enjoy this challenge as must as the rest as this one is fun to do.


For this card I used my favourite C5 size, used a cerise mirror card down one side and overlaid it with ribbon, had I sat and thought about it a bit longer I should have put the ribbon around the mirror card only and not the full card. I used a lighter pink mirror card matted onto plain white card and made a bow for the top. I have used a new kit from the Daisy and Dandelion range, I have used four layers. I then added the sentiment and embellishments which all come free with a magazine.


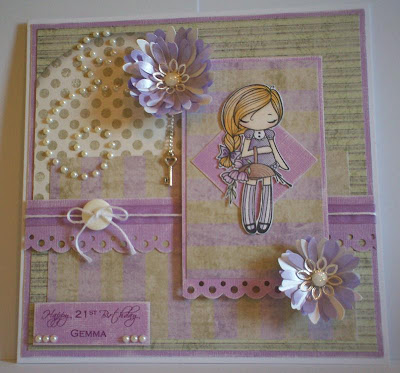
Started with a large 8" square card blank, used some old neglected 'twelvebytwelve' papers and some coredinations card that I sanded down to make it look more faded. Greeting Farm Miss Anya stamp, coloured with promarkers, cut out and mounted. The flowers were cut from lots of layers of pearlised paper with a sizzix die, and curled up with my bone folder, bead cap centres and brads added, then used lots of stickles all over the brads. Attached a little key charm on a chain using the brad on the large flower. Computer generated sentiment with a few flat back pearls added. The pearl swirl was made using a Bazzill template and adhesive flat back pearls. The scallop edges were made with a martha stewart punch and my ribbon element is a strip of sheer purple ribbon with a layer of white thread over the top and tied through a white button.


Mandy


I love the big decorative trees that people make using layers and layers of ribbon but they use something like 36 yards to cover a cone of polystyrene and that is a waste of yummy ribbon if you ask me. It did however inspire me to dig out my green ribbons and make a smaller version suitable for a card.
I used a sheet of A4 card as the base and covered the front with a Christmas paper from K & Co.
I made a base for the tree from a triangle of card and basically layered loops of ribbon onto strips of double sided tape in tiers.
The star is a chipboard shape covered with Rangers Glossy Accents and sprinkled with gold glitter.
The plant pot was made from scraps of card. I added another strip of ribbon and a mulberry flower coloured red with a Promarker.
Strips of braided ribbon were added along the top and bottom edges of the card. Small parcels are under the tree courtesy of Papermania vellum stickers and the sentiment is leftover from the La Pashe decoupage sheet I used for the last challenge.


Rose


Also take a trip over to Rose's Blog as she's actually an awesome cardmaker and knows what to do with a piece of ribbon or two!

Toria

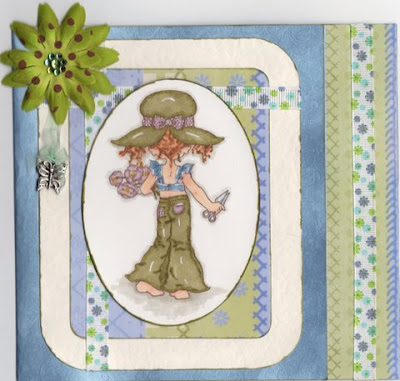
I used Sarah Kay Spring Blossom stamp, stamped with Black 'Memento' ink. I coloured her in with the following Copic Markers: E000 Skin White, R20 Blush, E21 Skin Pink, E37 Sepia, YG91 Putty, YG95 Pale Olive, B93 Crockery Blue, B45 Smoky Blue, Y11 Pale Yellow, V91 Pale Grape, C3 Cool Grey, W1 Warm Grey and W3 Warm Grey. I mounted her onto to a oval piece of card.

For the background I cut a rounded rectangle of cream card and rounded rectangle, slightly smaller than the first from pattern paper (free from a magazine). I inked both the rectangles edges with Copic Marker - YG95 Pale Green. I then stuck the smaller rectangle on to the larger rectangle. Using two pieces of ribbon, I wrapped one along the top of the rectangles and the other down one side of the rectangles. I then mounted the stamped image on to the rectangles.

The base card was created from a A4 sheet of textured mirri board, which I card strip about 2 inches from to get the size card I wanted. I folded the what was left of the A4 card in half and struck a piece of the strip I had cut off on the of the card to create a longer back flip. On the front of this flip I glued a strip of matching pattern paper, with the edges inked with Pale Olive, and then a strip of ribbon down the centre. I glue the rectangles to the front of the card. Glued a flower that I created from two silk flowers with stick on gems in the centre. Added a charm attached with ribbon, from underneath the flower. I added a handmade bow to the top of the charm.

To finish I inked the edges of the card with the same Copic Marker - YG95 Pale Olive.
Vix


For this challenge I wanted to show you a notebook, I make lots of these with a Bind it All machine. You can also make them with bought notebooks (destructions will be on my blog)
I made the notebook by covering mounting board with some paper dyed with starburst stains which is also used for the matting. The image is a digital stamp by Victoria Case and is coloured with Promarkers from Joanna Sheen I used Shimmerz in pixie dust for the fairy wings. I've then got small pieces of ribbon and tied these securely onto the "O" rings of the notebook. I tend to use 3 lengths of ribbon per ring to bulk it out.

Now without further ado, let me intoduce you to our special guest for this challenge, Pauline Carr (Passion for Papercraft) Pauline has a beautiful way with fibres, ribbons and lace. She might be familiar to Penny Black fans as she is on the design team for the Penny Black Saturday Challenge!


Thank you for joining us Pauline!

SPECIAL GUEST DESIGNER - PAULINE CARR - PASSION FOR PAPERCRAFT

Wednesday 14 October 2009

How to add items to your sidebar

I have already posted this in the general Q&A but have been asked a few times lately how its done so thought I'd make a separate post for customising your blog by adding pwitty backgrounds and adding items like blog candy alerts and blinkies to your sidebars.

HOW TO GET A PRETTY BLOG

This really is very easy! If you see a pretty blog around chances are there will be a link to the creators somewhere (Look in top right corner somewhere usually)

Go to their link i.e http://www.thecutestblogontheblock.com/ or http://bloggerblogbackgrounds.blogspot.com/ for the gorjuss girls ones.

They will all have instructions on site on what you need to do but generally they will have a code you highlight and copy.

1. Go into your customise option (top right of screen)

2. Add a gadget and select the html option (about 3rd one down) and copy and paste the code across from the site.

To make a personalised banner you need to download this and edit it in software such as paint shop pro or you can edit online at places such as photobucket.


HOW DO I ADD ITEMS TO MY TOOLBAR SUCH AS BLINKIES AND BLOG CANDY?

1. Right click the image and select save. Save the web address of the blog

2. Go to your customise option top right again and ADD A GADGET, select picture. Click browse to find it on your PC then upload. In the same box you will see link: http://

3. Paste the web address of where the candy is or where the blinkie is from & add a title if required so for example...

Title: Rowenas Blog Candy ends Oct 09

http://craftypagan.blogspot.com/

Upload image from your PC.


You can add blog lists, link lists and much more. They are self explanitory and once you've mastered inserting a code for a pretty blog you can do anything lol!

Good luck!

Monday 5 October 2009

CHALLENGE 4 - 3D ELEMENTS

Wow many thanks for all your super entries for challenge 3 - A Sketch. You've done some awesome work so a big cheer for you all! We're also honoured to see many people taking part in their first challenges or sketches this time too! Well Done to you all!

We received 36 entries (Suzy, terry, kazabing, alison, lynne, rachel, aimee, jenny, sarah, julie, pauline, phantos02, lilian, caro, louise, valerie, carol, tracy, sue, lisa, snooptigger, crazycraftshed, dee, tracey, kip, julie anne, nicola, evelyn, cheryl, looby, sue mc, maria, shell, kat, amy, mandy) so thank you all!

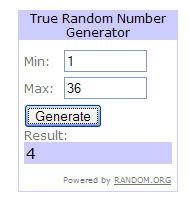
****The winner of the Joanna Sheen £10 voucher is No. 4 - Alison! Please email me so I can organise your prize, well done!

Now our winners for the Top 3 blinkie! It was extremely tough again as they're all such beautiful creations but the ones this challenge we have chosen are in no particular order...


Sarah - Clarabellecrafts
Louise Z - Louise's Free Time
Dee - Des'igns


Well Done girls, please grab your blinkie from the sidebar to use on your blog x

For our 4th challenge we are again kindly sponsored by La Pashe and Cardmaking with Imag-e-nation who have also donated the DT some items to play with so a HUGE thank you to them!


This time the prize is the full set of the new Christmas flippin decoupage which also include free inserts, a full set of the flippin teenagers decoupage which I have to say is brilliantly done! It is like a history of teenagers over the last 50 years or so up to present which I think would be fabulous if you printed the insert using a photo of a relative or friend dressed just like that! I'm sure most of us have had a Teddy Boy uncle or a hoodie nephew lol! Also included are 2 of the remember when sets (Series 5 and Series 6 in colour) some aperture cards and acetate so tons to play with and thank you once again La Pashe for your generosity!


Onto our 4th challenge which is 3D ELEMENTS. There is a tutorial/info post further down (or click here) to explain all about using 3d in your work. You can use anything you like so long as it has at least one 3d element on it (printed decoupage, peel offs, stamped images etc)


Please post your entry in the comments box at the bottom below Judy's card by Monday 5th October 12 noon UK time.


Lets see what the design team and special guest have come up with to inspire you!


Jenny


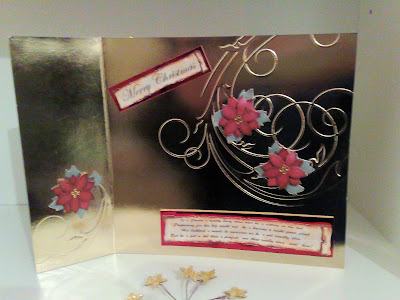
La Pashe Santa in bath sheet , A4 Gold embossed sheet - front, A4 Gold mirror board - double sided, A4 Acetate, Red mirror board for matt, Posinattes - image from internet and printed onto special effect paper(pearl finish)(Crafters Companion) Gems from stash, Anita's clear Gloss
White Glitter
On the Santa image i have put gloss on the water and then added glitter before it dried.


Joy

I started with a square white card and added the pink octagonal frame. Then I put the Lagonda Wedding car by la Pashe off centre the remaining layers were added using Glue Dots.
The tins where stuck onto the silver *rope* which I made by taking some of the silver strands from some silver cord that I have in my Stash!


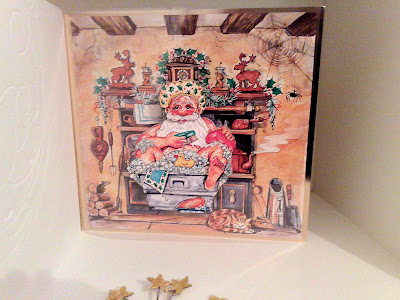
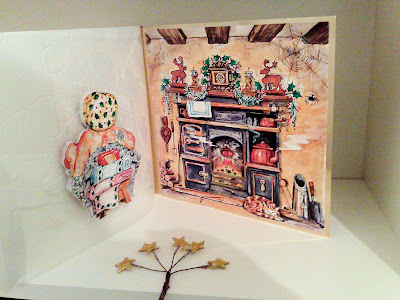
I used the new Flippin Christmas decoupage from La pashe - I choose the Father xmas sitting on the loo as its quite a funny card and makes a bit of a change.

I followed the instructions that came with it and stuck down my acetate with double sided tape in the centre and closed the card up, added the backing paper to the inside so that there would be a back drop for him, added the front first and built up the layers then turned over and added the back of him and built up the layers.

Looking at the card i felt it was not finished !!! So i hunted around for some holly, didnt find any so i settled for my leaf punch and punched out loads of leafs in four different colour greens - I then added the stem to join them all up and then glued on loads of little red beads to act as the holly


I used the flippin blank aperture card and one of the Flippin men sheets we received with thanks from La Pasche. I printed the inside page from a picture my OH took and has on the Internet. My mind has not been very imaginative with the outside, I am sure that we all go through a time when our minds are blank, anyway I decided to stick the leaves at the top from a kit I have had for some time, I used the card that I popped the leaves out of as a stencil and used chalk to make the other patterns on the front.


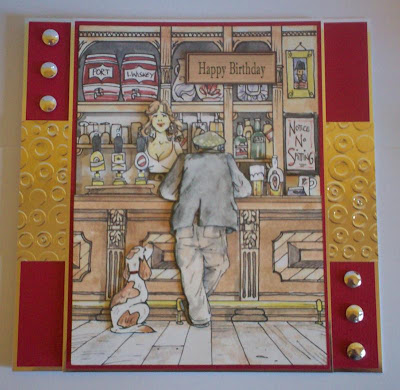
I've used a 'Remember When' decoupage that La Pashe were kind enough to let the DT use. It's very big and detailed, so I've kept the rest of the card quite simple. I've mounted the scene onto red coredinations card and silver mirri card, covered the card blank (a large 8" square card) with the same coredinations matted onto mirri card, then added a panel of mirri card that I've embossed in the big shot using the cuttlebug 'spots and dots' embossing folder. Finished off with a few silver card candy dots.


I used a decoupage design from La Pashe's Flippin Christmas range. There was a lot of cutting out (which I love).The designs are well thought out and it is very easy to see the order for making up the layers.
I used an aperture card specially designed to go with these sheets. You sandwich the acetate between the layers and then stick the front of the image to the window.
It is very easy to line up the back of the image to the front and so unusual to have a double sided 3d image.
You also get a themed sheet for the inside of the card and this has 4 separate sentiments on it, so that's 3 extra freebies once you have finished your card:)
I finished off the card by using some red and green chalk and a cotton wool ball to add a bit of colour to the front. I also used some Papermania peel offs and some clear holly stickers from the Forever Friends range.

I really enjoyed making this card. It is the first time I have used any La Pashe products but it won't be the last as they make such special cards.


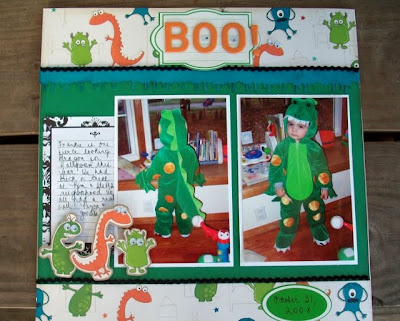
I took the monsters from my patterned paper and cut them out and mounted them a couple of times. I elevated them and added googly eyes to really make them 3 -D. I added additional googly eyes in the BOO! I love how this turned out. (So do we!)


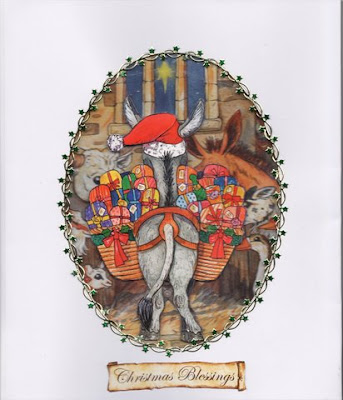
I have used one of the La Pashe Christmas decoupage scenes. I have put the stable scene inside a card blank, and have add some glitter to the star.
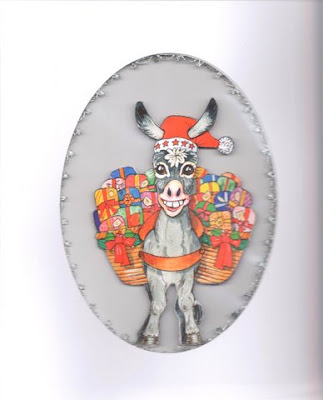
I have place the behind view on the front of the card and the front view inside. Just to be a be quirky. I have added some peel off border around the aperture.


When I saw this La Pashe Ferrari decoupage my immediate thought was of South Africa. A lot of car adverts are filmed around the Cape Town coast as the light is well... different! I can't explain it unless you've been there but it is! So with this in mind I wanted a beach scene as I remember watching the sun go down on llandudno beach there, no not the one in Wales lol! I created the scene using starburst stains and some black card for silhouettes and added the la pashe Ferrari 3d image. It needed something more so I have quite a saucy stamp of a naked lady in the water, I stamped her and coloured her with promarkers, added some sticky gems as jewellery and hid her blushes behind the car. Added a gret big brad with a rub on saying "Dream" - perhaps I should write "On!" underneath!


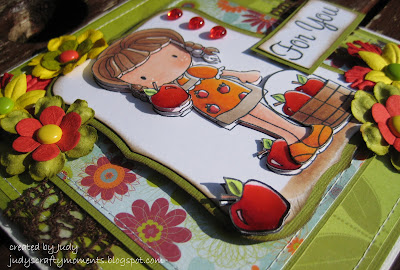
Okies onto our fabulous guest designer who is the marvellous Judy Laing! Judy might be familiar to craft stamper readers and her making the use of a sewing machine on cards look like childs play! Check out her banner, she coloured that image herself, wow! She is a designer for Sugar Nellie blog, Quixotic Paperie and The Sugar Bowl and she has created this gorgeous design for us using 3d on a stamped image so Thank You Judy!


Thursday 1 October 2009

LIST OF CARD CHALLENGE BLOGS

I have taken the contents of this page down because I realised that many of the challenges were sadly no longer in existence, and in fact many, many more have been created since this page was first published. If you want to find a quite good list of challenge blogs please visit Paper Playful, where you will find lists of challenges as they appear with the current challenge, also lists of winners. etc.


HOWEVER, PLEASE ALWAYS READ THE RULES before entering any challenge to make sure that you haven't exceeded any combination limit, or that you are not infringing any other rule they have in place. Also PLEASE ALWAYS READ the full challenge criteria. You have no idea how frustrating it is for busy Design Team members to visit a blog only to discover that they haven't actually read the challenge at all but just saw the title, assumed (often wrongly) that it covers their creation and thrown it into the mix a bit like a hit and run accident. Please do not just go off the title line on Paper Playful, but open up the challenge in question and have a good read.