We are grateful for our lovely followers

Follow on Bloglovin

Google Website Translator Gadget

Monday 31 May 2010

Challenge 22 - Least & Most

Thank You all for your fantastic entries to our Inside Out challenge! Such a wide range of ideas and styles, if you get some free time go take a peek at the entries! I'm glad you enjoyed that one even if you only get round to decorating the insides on occasion you know how special it makes a card look.
Thank You also to our fantastic sponsor Joanna Sheen for her support once again and to Susie Sugar for being our special guest! We're finishing off our comments rounds and we will be back with winners in a week or so!

*******************************

Challenge 22 - Least & Most

Our challenge to you this fortnight is a colour challenge, please make your design using your MOST FAVOURITE COLOUR COMBINED WITH YOUR LEAST FAVOURITE. Makes for some interesting combos that you may otherwise have avoided! Just a note, yes black and white do count as a colour choice e.g black least fav and pink most.
Use your chosen colours predominately on your design and lets see what you come up with, ya never know you might like it! Please remember to link back to us, there are tutorials in the sidebar if you don't know how to do this.


We're sponsored for this challenge by the fabulous Stitchy Bear Stamps who gave the DT a choice of images to play with. Gosh how can we choose!!! There is a huge selection of digital stamps, papers and elements to choose from. Here's what co-owner Stitchy has to say...

"Hi my name is Stitchy and I am Co-Owner of Stitchy Bear Stamps...we started this store April 1st, No Fooling haha..I live in upstate New York with my husband and two TEENAGE adults haha, I do say that loosely as they think they run the show here, NOT...
I been creating stamps for a little less than a year now and I am totally addicted to the craft..I started about 4 years ago making digital scraps and I knew there was much more out there, so a friend of mine introduced me to digital stamps...and the rest they say is history...I look forward to seeing all the beautiful creations come through...good luck everyone..stitchy xoxox"

Stitchy Bear stamps is offering the lucky winner a choice of any 3 of their digital stamp range, thank you Stitchy!


Challenge closes at 12 noon GMT on 13th June, please link to your creations via the blue froggy thingy! Quite like that as you can see all the entries!


Lets see what the girls have come up with using images provided by Stitchy Bear Stamps.

GUEST DESIGNER - RACHEL


Using Relax Silhouette with her colour choice of Teal and Brown

Joy


I found that this challenge was difficult to work out how to do as I love all colours and do not have any that I do not like. Finally I decided to use Red as my favourite and Black as the least favourite simply because I do not use it as often as I use other colours. I tried to keep the number of colours I used to a small amount as I think I often use too many, but did you two different shades of what I thought was Red although one looks more like pink doesn't it?
I used a square red card and added a piece of black paper which I had put through our crimple so that it looks like corrugated paper.
Next I coloured in The Raggedies picture using Dovecraft Dual Permanent Markers. and then stuck it onto the black paper using DST & finally added a silver corner shape in each of the four corners & Best wishes at the bottom of the picture.
I really did enjoy making this card and hope that you enjoy looking at it.


Jack

(Jack has been busy with family so wasn't expected to take part but managed a creation at the last minute!)

For my card I have used one of my favourite (but subtle) colours - Grey - plus a colour I find really hard to use - Orange. I started with a white card blank and then added a piece of orange card that I had edged with my Fiskars Punch and Emboss punch. Then on a central strip of white card I stamped Creative Expressions French Script in grey using a felt pen to colour the stamp. I also rubbed some grey pen on a tile, spritzed it with water and sponged it round the edge of the card. The flowers are Hero Arts Verbena, again coloured with felt pens in grey, orange and a touch of red, then spritzed.

Judie


I am afraid I have cheated a bit here, have not had time to make my backing papers this week so I just used backing papers (shop brought) printed out my image Army Dude supplied by stitchy stamps (thanks so much for these), coloured with glitter pens and added some leafs and card candy.
For the least and most colours, well my fav is always green/s and horrides are always pinks/red

Julie


For least and most I have used the green which I love at the moment and brown which I would not choose for cardmaking although I have a lot of it in my house !! I started with a square card, punching some shapes and matting and layering, using papers from Papermania Temptations paper stock. The image is Playtime from Stitchy Stamps which I have printed and coloured with promakers. The flowers are layered and attached with a brad.
Lisa used black for her least and pink for her most using Butterfly Love with core-dinations cardstock and a martha stewart Doily Lace punch.


On holidays - To Follow


I decided to use lilac and brown for my colour combo. I do not really have a colour I am not keen on, but do not use brown very much, so thought I would use it this time. Lilac one of my favourite colours. I used Relax Silhouette from Stitchy Stamps. When I saw her, I knew what I wanted to do. I had seen this shoe template on a blog and had to have a go at it. I created a background with starburst stains and use the image to create a shoe buckle. The flowers are created using punches from the starburst background and the brown paper. I added stickles to the centre of the flowers. The leaves are also from a punch. I also added ribbon and a beaded fringe to the side of the shoe. I think that the colours work really well together.


Vix

For this challenge I decided to challenge myself a bit having never used a digital silhouette before as I'm a promarker fiend so I opted for "Watching You" I've used blue as my favourite colour and orange as my least.

First I printed the image out onto card to test and my printer ink was running with all the inks I tried so I changed tack and carefully marked on a sheet of A4 card where the image would print, added a circle mask for the moon and used a brayer with a big and juicy inkpad (Beach Umbrella) to colour the card then removed the mask, heat set and printed the image directly onto it. I've hand drawn a rock and coloured with distress ink then I've then inked around the edges, stamped oak tree branch by stampscapes, gave it a spray with iridescent gold glimmer mist and added some sticky gems to finish.

May I now introduce our very quirky special guest Cheryl! Cheryl is on the design team for Stitchy Bear Stamps, Creative Inspirations and Lil Diva Stamps. She has a very unique attention to detail which is delightful, adding litle feathers and unique flower arrangements to her designs which is a real treat to see.

SPECIAL GUEST DESIGNER - CHERYL - CHERYL'S CREATIVE CARDS


1. How long have you been cardmaking and how did you get into it?

I have been cardmaking for nearly 2 years,but only seriously for one,when I got my blog. With the kind help of my dear friend Jude at creative inspirations.
I got into it through illness,Severe Depression,eating disorder,with combo of arthritus,and saw Dawn bibby on TV one day saying this can help people,so I gave it a go and the rest they say is history. It has really helped me a lot.

2. What techniques and materials do you like most and least?
I love using pro markers,and distress inks especially shading,and doing direct to paper techniques.
I also love punches,flowers,and ribbons,as they add so much dimension to a card,plus lots of sparkle too.

Least favourite,not sure really as I love to have a go at anything but if I had to choose I would say decoupage,especially if you have to cut it all out yourself.

3. You have an eye for detail and create some wonderfully unique embellishments, tell us more about these.

I have no idea were my ideas come from,it depends on the challenge,image,and how the image looks to me. Like when I did the wee duck in the bath,for the bubbles,I used,drops of pearl paint,then waited for it to dry then,added stickles glitter,to make it look,more effective. A picture or layout will always say something to me,no I am not daft well some may disagree,but it does,it takes me usually a day to make a card I will get the image printed or stamped,then decide on my colours. Lay out the papers,pens,etc then go off make a coffee,do something else then come back to it make a definate decision on the colours I want to use. Then i colour in the image,then go off again,then design the layout several times unless its a sketch I am following. Then it will take me hours to get the correct papers,then i put the card together,then decide if it needs,little embellishments,a lot of that something extra,like stitching,adding pins,feathers. I never decide untill the card,is all laid out.

4. What do you love most about the blogging community?
Making friends,helping people out,and learning,new things,I adore my DT work as it brings,so many wonderful people to my blog,and all the DTs I am on, are the most amazing people to work with.And would love to thank them all for allowing me to be part of it. And to thank all the generous people who visit me each day.

5. Your top 3 tips

1. Always plan your cards first decide on the image,then colurs,then plan the layout.

2. When working with Pro Markers,always colour the face first,that way if you happen to go over onto another part of the image,its easy to cover with darker pro markers

3. Always use good card stock especially for stamping your images onto I always use Bristol board,and card from the craft barn,makes such a difference to the finished card. Also materials, its always great to find a bargain which you can in most stores,so when you see your favourite papers flowers etc Always stock up if you can as a card made with good crafting items makes a professional finish.


Thank You Cheryl x

Sunday 30 May 2010

Winners of challenge 20 - Distressed

Gosh you've caused so much nailbiting with this challenge lol! Our Top 5 choices was the most difficult yet, just so many fantastic entries wow wow and wow! We've scratched our heads long enough and have no nails left to chew so the winner picked at random for the £10 voucher for The Stampman is...
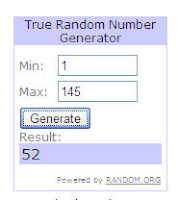
52 - Rainmac Well done hunny! Please email me your details to claim your voucher!


Onto our Top 5 picks for the distressed challenge! I'd just like to add that there were so many fantastic entries we really did struggle choosing for this one so well done to you ALL who played!

In alphabetical order our Top 5 are...


Well Done ladies! Please grab your Top 5 blinkie on this post!

Thanks again to The Stampman for sponsoring our challenge!

Monday 17 May 2010

Challenge 21 - Inside Out

Thank You all for your superb distressed challenge entires, fanastic work, well done all! I'll be back with the winner of The Stampman voucher and our Top 5 before the next challenge when we've finished our rounds!

Thank You to Jill from The Stampman for being our special guest and sponsor and to Claire for being our guest designer.


***************************************

CHALLENGE 21 - INSIDE OUT

Our challenge to you this fortnight is to decorate the insides of your cards to give it that extra special touch. There are no rules for the outsides, you can create whatever you like but we'd like to see a pic of the inside decorated. You can keep it simple or make it an extension of the front the choice is yours!


We're sponsored for this challenge by Joanna Sheen who is offering a £10 voucher to spend in her fantastic online shop. New items in include a range of stamps by Jane Netley Mayhew of animals and birds and some very cute House Mouse Decoupage sheets and some super sweet Patchwork Polly stamp sets designed by Jayne Nestorenko.


Also red hot off the press are the brand new Pamela West CD Roms which have just launched which you can see here


Thank You for sponsoring us again Joanna!

Challenge closes at 12 noon GMT on Sunday 30th May,please leave a link to your creation in the blue linky thingy below! Good Luck!

Lets have a look what the team have come up with - Thanks Ladies!


I used a cream card, cream flowers, bright green leaves which i stained with stinky fingers stains, which I also used to make the background papers and stain the card, the colours I used were Autumn inks in maple and gold and then brought out the colour washing it with firework burst in red. I used some nesties to place the lady from Dimension Fourth Limited "I LIKE", the inside is the part we are concentrating on this weeks gals, so I was a bit lost, but followed through from the front to carry on building up the layers and used another stamp from Dimension Fourth just popped in the corners. Quite enjoyed doing the inside, might become a bit more of a habit now.


Joy


I used a large green card & on the front added the frame with a pink single rose which was in decoupage & which I had purchased from CraftsUPrint, On the inside of the card I added the words Happy Birthday, and put silver corner peel offs, with a set of 7 candles in the middle, and some parcels & a single heart shape above it. - I normally colour the peel offs using watercolour pencils but didn't this time as I like the green of the card coming through the pattern.


I don't normally decorate the insides of my cards, I normally just print a folded insert with my verse but I must admit it does finish a card off nicely.


I started with a square card, I used background paper from a PM paper pack and cut it to size. The circles I have cut using punches I bought about two years ago and think i have used once. The image is stamped from a Paper Nation stamp and coloured with promarkers. The layers are actually mounted with 3d foam pads however the photo does not show it. I have used glossy accents on the shoes and the flower in her hair. I finished the front off with the word "Love" also cut out of the paper pack and a few little bling jewels.


The inside is decorated with the same papers from the pack, the corners are made from a circle punch which again I have had for years and not used, I have then cut the circle into 4 to make up the corners. Hope you have fun joining in this challenge.


Mandy


The brief for the inside out challenge is to decorate the inside of the card as well as the outside. I have to admit this is something I don't normally do as I don't have much time for crafting due to work commitments, but it does make a card seem more finished and special.

The image is a rubber stamp from Wild Rose Studio. I have coloured it in using Promarkers and used paper piecing for the dress and scarf. This card is for my Sister in law's birthday on and I have personalised the hair colouring to match hers. I think this is a great image for doing that.

The inside of the card has been decorated with matching paper, more rubber stamping and a couple of sentiments.
Information on the materials used can be found on my
blog.


The card is created using Papermill Card and Papermania paper. I have used a border punch on the card and have added stickles to the edging. I have also distressed the paper and have added chalk to the edges for colour. I have added gathered lace and created a scene using two magnolia stamps from the magnolia spring club pack. The images have been coloured with a combination of Derwent Inktense pencils, Copic’s and Chalks. To the corner I have added flowers from Wild orchid crafts. For the inside, I used the same technique on the paper and have also added a border to one side. One of the panels is raised slightly on sticky pads, so the matching bookmark can hang from it. The frog image is also from the magnolia spring club pack and has been coloured with Derwent inktense pencils.


Vix


I have used the same papers inside and out which are Stampin Up - Tea & Crumpets. The band across the front and the panel on the inside I used a Martha Stewart doily lace punch on white card sprayed with glimmer mist which I thought matched the bottom of Tildas dress very well. The writing panel on the inside I have distressed with worn lipstick distress ink ) and I've also glimmer misted all the flowers on the front. Tilda is coloured with promarkers and I was originally going to do the wings & dress with a glue pen and glamour dust but it was all sparkly and I kinda carried on lol!


I think adding a matching inside really gives a card a very special touch and look forward to seeing your creations :)


Now I shall hand you over to our Special Guest Designer - Susie Sugar from Die Cut Dreams!Susie has been a regular player in our challenges and she has such a lovely style along with her business selling custom die cuts among other items. Susie says this...


"Hi, my name is Susie. I'm in my early 40's, Mum to 2 lovely teenage sons Reid & Woody and wife to my best friend Garry. I have been crafting since 2005 when the bug bit me. I now run my own design die cut business called Die Cut Dreams ( http://www.diecutdreams.com/ ). I love most types of paper crafting, and often wonder what I did with all my time before I started crafting and blogging ...... There just isn't enough hours in the day as I'm totally addicted to all things crafty and couldn't imagine life without craft and my blog"


SPECIAL GUEST DESIGNER - SUSIE SUGAR - DIE CUT DREAMS


And our questions for Susie...


1. You have a business selling die cuts, which are your favourites and what other materials/products do you love using?


Yes my Shop is called Die cut Dreams , my favourite die cuts at the moment are mat & Layering shapes I have my own designs and love using them for stamping on.


2. What are your achievements and future plans?


I had 2 pieces of work pubilshed in the first 2 editions of the Magnolia ink magazine Future plans ; I have nothing much on the cards at the moment as we like to spend most of the summer down on the beach (which is only 2 min's away from my home) I do have some more shape die designs in the pipeline.


3. What are the last 3 items you bought and why?


24 metres of Prima lace ....why? Coz I love it to bits !! Lol!


2 sets of Stempelglade Stamps


Spellbinders Butterfly dies


4. What do you enjoy most from blogging and its community?


From Blogging its self I'm amazed at how much I have learnt since I started blogging nearlly 2 years agoAnd from the blogging community I have made so many friends, the craft world is full of so many warm hearted people.


5. Your top 3 tips!


1. I always like to lay my planned card out first ones I see it laid out then I think glue !!! Lol I have made so many mistakes by gluing before thinking and I must say none of them were "happy mistakes" lol


2.I always use EZmount foam on my unmounted rubber stamps , you always get a better stamped impression than if you just use the bare rubber slapped onto the acrylic block, its worth the little extra cost.


3. Ok this ones not just for craft its for life in general and its what my dear old nan used to say to me and its always been good for me so I decided to share it with you, I can see her now as she used to say "Susie what ever you give in life or to life ....you will always get back...it may not be from the same person or source but if you give you will always be rich in some way" and I know it may sound daft but I think she was right !!

Thank You Susie!


Saturday 15 May 2010

Winners of Challenge 19 - Desert Island

I'm finally here with the winners of Challenge 19 - Desert Island. I'm currently collating all the info of what you have used as your must haves and will be posting that up in the next week or two so thank you for taking part!

Okies onto the winner of the Joanna Sheen voucher, thank you for sponsoring us once again Joanna!

Random.Org has chosen.....

37 - WENDY! Well Done Wendy, please email me to claim your prize!

Onto the winners of our Top 5 Blinkie! Well Done Ladies!


SHARON

Monday 3 May 2010

Challenge 20 - Distressed!

Thank You muchly for playing in our desert island challenge, wasn't as popular as others so maybe you couldn't decide what to take (or couldn't fit EVERYTHING onto your design hehe!) I'm still collating the info and will post it up here when done so you can see what the trends and sure fires are but popular are definately nestabilities, distress inks, promarkers/copics, sticky gems/pearls, magnolia stamps, digi stamps and cuttlebug so will add the full list soon!

Thank You also to Joanna Sheen for sponsoring us once again and to Katie Tate for being our special guest and to Janey and Debs for being our Guest Designers, muchly appreciated!

Remember if you'd like to be a guest designer for our next but one challenge just type GDT after your name on your entry.


*************************************


CHALLENGE 20

For our 20th Challenge we are asking you to use DISTRESSING on your design be that by using inks, paper tearing, crumpling etc. If you've never distressed before then have a look at what the team have made and if you have a free evening I can thoroughly recommend a glass of wine (OK for me its a cup of coffee or two!) and an evening with Sir Tim on you tube. The ranger channel can be found here - enjoy the journey!


We are sponsored once again by The Stampman and are also thrilled to be joined by Mrs Stampman as our Special Guest! They are offering a £10 voucher for their shop which has so many niiiiiice products in! I actually got to go there last week and kid in a candy store I was!

There is currently a special offer on the new distress ink colours and you'll also find tons of the new Tim Holtz dies and masks. Also at The Stampman you'll find great stamps designed by Tracey Coates and sparkly things like starburst stains!


Lets see what the girls have been up to for this challenge! We are also joined by our guest DT - Happy Days (Claire)!


Loved this challenge, distressing, well I've gone a bit mental here lol, didnt want to go down the normal route of doing something vintage so i have gone sloppy distressed. I have used my rippy faithful friend the ruler and distressed the papers, made my own flowers by ripping papers and added some glue mixed with some paint for the middle, then made some leaves to add on - i used a toothbrush to flick on some inks to bring in the red/pink. I have used distress inks on the edges of all the papers and the actual card as well.

Julie


I started with a square card and a sheet from a paper pad, I cut the paper to size and tore a corner off, I went over the torn edge with two different coloured ink pads maroon and dark sand. I punched two hearts, went round the edge of the first one with the dark sand ink and scrumpled up the second one. I straightened the heart out the best I could and went over the top with the same ink pad, once the ink had dried I went over it with a cool iron under some tracing paper. I mounted the hearts with 3d foam and added the two coloured button brads to two of the corners.


Lisa

I've used a digi stamp from Digistamp Boutique, coloured with promarkers. The papers are K&Co 'sparkly sweet' with Coredinations cardstock. I've embossed a piece of the coredinations with the Cuttlebug 'Julie's jewels' embossing folder and then sanded it back. All the coredinations edges have been sanded, and then I distressed all the paper and cardstock edges with scissors. I then went round all the edges with some stickles for a bit of sparkle. Added a piece of jute ribbon, some tiny punched butterflies and a computer generated sentiment.


Mandy

For the latest challenge we are to use distressing techniques. I personally admire very talented peeps who can do this, however I always feel that my attempts look very amateur in comparison.

The distressing techniques I have used are inking the papers with a Tim Holtz distressing pad and also a Versafine chalk pad in green, love the soft finish the chalk gave to it. The stamped image I have distressed with the edge of a pair of scissors, I love the roughed up texture it gives and this absorbs ink really well. I also bought a distressing tool from Do Crafts and used it to scratch away at the edges of the chocolate background paper.

More details of materials used are on my blog.


For this challenge I have used my "lucky stamp" which is celestial dreams by stamp oasis available at The Stampman. I call it my lucky stamp as every time I used it to enter competitions or submitted to reader galleries it won or was printed! The background paper was made by stamping distress inkpads directly onto paper to create squares, torn and ink rubbed along the tears. Another piece I used the spun sugar inkpad across a piece of card, used the divine swirls cuttlebug folder then swiped across with the pumice stone inkpad. The sentiment is on crumpled paper where the inkpad is swiped across the crumples and I've brushed ink onto glossy card with the image and added gold foil and glitter.


May I introduce you to our Special Guest Designer, Jill Tuck - Mrs Stampman or to me "Boss Lady"
Jill will be familiar to many for her appearances on Create and Craft TV full of inspiration and tips. She also runs The Stampman shop with her OH Mr Stampman which you will find here! It my favourite place and I was lucky enough to go visit it in the flesh last week and wow! If you've never checked out their site before then you're really missing out on some wonderful products!

SPECIAL GUEST DESIGNER - JILL TUCK - THE STAMPMAN AKA MRS STAMPMAN!


The Stampman's blog can be found here, please pop along and say Hi!

1. You're often on create and craft tv, how did that come about and do you get nervous?

I believe it was about 6/7 years ago when Create and Craft contacted us by phone to ask if we'd be interested. It wasn't until I was chatting to a friend, Wendy Stenton of W S Designs, who said she was going to do it that we considered it as I really didn't want to do it but Wendy said she was happy to do shows for us. Wendy did 3 hour shows and 2 1/2 hours shows for us before I decided I really ought to do it myself. My fear was that when I was 20 I was interviewed (at least 4 takes) on Breakfast TV about the future role of the secretary, mainly about technology in the office etc. It was horrendous and I vowed that I was happy that I'd had my 15 minutes of fame and never wanted to go there again, now look, I have lost count of how many hours I have done now!

I do get very nervous still, and never sleep the night before. I do have a love/hate thing with it though. Funnily enough I've not found any difference in whether the show is live or pre-recorded, either way it's still got to be done so I just get on with it. The presenters and crew are so friendly we are often chatting with 1 second to go before filming and I then turn to the camera and think oops, what am I doing here? My brain goes blank for a bit so I'm grateful that the presenters chat for a while at the beginning of shows!!! By the time a show comes to an end I'm loving it and don't want it to stop. Once the shows get going I'm fine and the hour just always flies by.


2. You've just celebrated your bloggerversary, what do you enjoy most about the blogging and crafting community?

Being part of what it is, a crafting community. About 15 years ago I started a printed monthly newsletter, it grew and grew until it became an unmanagable beast! It ended up being 56 pages, colour and apart from costing a fortune to print and post, it took so much time to do. The project and product photos were not great quality at the time and readers really had to use their imagination with them. It was very popular at the time but as I say, it grew into a beast! I now enjoy blogging as I can post regularly, am able to show photos and it is easy to do when you get the hang of it. I LOVE holding the giveaways, receiving comments etc, and am grateful that people wish to follow it too. I've met a completely different set of people through blogging.

3. What are your favourite crafty items to work with?

Starburst Stains and Moonshadow Inks of course, but basically anything involving using a rubber stamp. Within this I have my long term favourite, which is anything embossing, especially UTEE (ultra thick embossing). Ilove my Cuttlebug, embossing folders, nesties and now my growing collection of Tim Holtz Sizzix dies! Another favourite is Distress Inks.

4. Your achievements and future plans.

The main achievement is to have been in the papercrafting business for about 20 years, we started right at the beginning when it wasn’t even considered a hobby. I have been lucky enough to meet lots of talented people over the years, attend brilliant events here and abroad and I feel I have learnt and shared a lot during this time which is a rewarding achievement. As for future plans, we'll just continue doing what we do, that's as much as I can say on that really.

5. Your Top 3 tips!

Not sure if these are my top 3 tips but those I've just thought of at the moment.

Buy good quality basic essential materials from the start, such as Versamark embossing pads, a permanent black ink pad such as Stazon, Memento or Ranger Archival ink. Never be afraid to ask for information in your local craft shop, there's many a time I've asked customers what they are going to do with a product (just because I'm nosey) and find they've nearly bought the wrong thing because they weren't totally sure what they needed.

A simple and perhaps obvious one is to tape a carrier bag next to you on your work desk, you can drop in any rubbish, all those backing strips and pesky little squares from double sided products can be taken off and dumped in there straight away. Helps keep a tidier work space and saves time for more crafting.

If you haven't already got one, invest in a non-stick craft sheet, I've used them for years and I think they are an essential piece of equipment as it enables you to do so many more techniques and saves wasting paper. It can be wiped clean and any embossing powder residue can be scraped off with an old credit card or acrylic block.

Thank You Jill!